This post will present how to setup the Contact Form 7 plugin. Contact Form 7 can manage multiple contact forms, you can customize the forms and the mail structure.
The form supports Ajax-powered submitting, CAPTCHA, Akismet spam filtering and much more.
First step is to Install the Contact Form 7 plugin
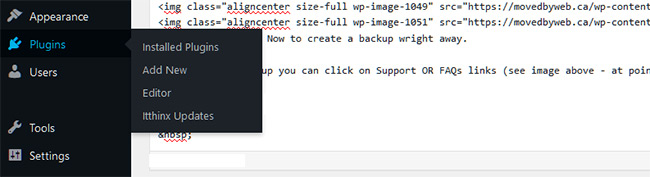
1) WP Admin page – Menu on the LEFT side of page SELECT Plugins tab.
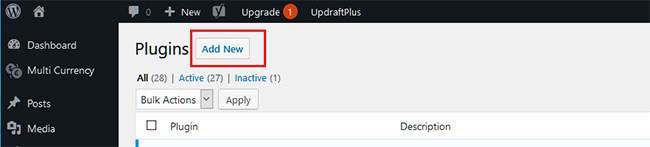
2) Now search the the Plugins page on TOP LEFT and Select Add new tab.
3) Further on the NEW PLUGINS page, go to TOP RIGHT and under the Search field type Contact Form 7. After this look for the Contact Form 7 plugin.
4) Install the plugin and in any case do not forget to ACTIVATE it.
At this point you are ready to setup Contact Form 7 plugin
5) WP Admin page – Menu on the LEFT side of page SELECT Contact tab.
8) If you want to setup the Contact Form 7 to use Google reCAPTCHA go and select Integration tab. If NOT GO TO STEP 11
10) Enter the Keys in the plugin fields and Click Save.
11) Now we will create a new form. You can add the form to a Contact page or to a Widget
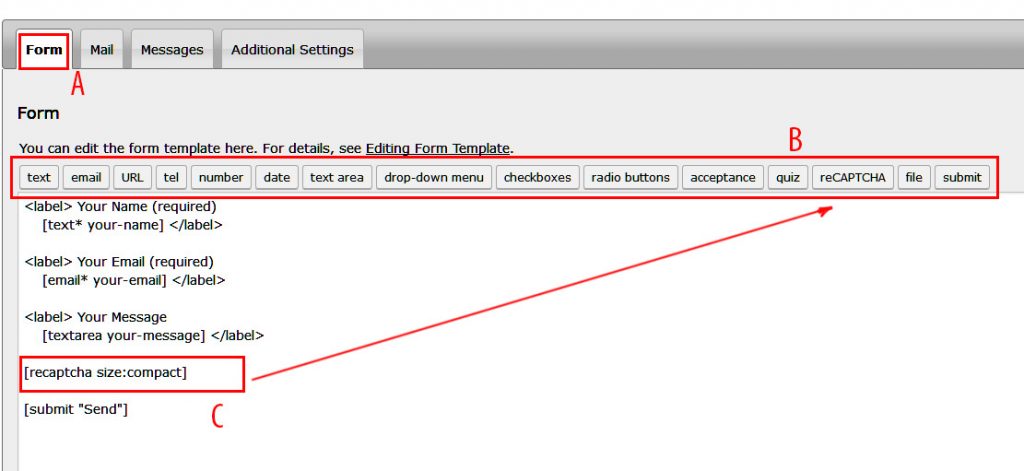
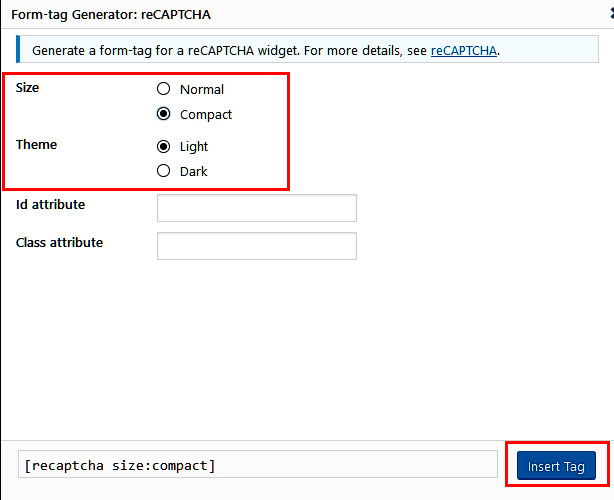
12) Under tab (A) you can customize the fields what will appear on you form. You can add more fields by clicking on the provided tabs (B) The recapctha (C) was added by clicking on reCAPTCHA tab under (B).
You can select Normal OR Compact, Theme Light OR Dark. Not necessary to add something under Id attribute and Class attribute. Click Insert Tag
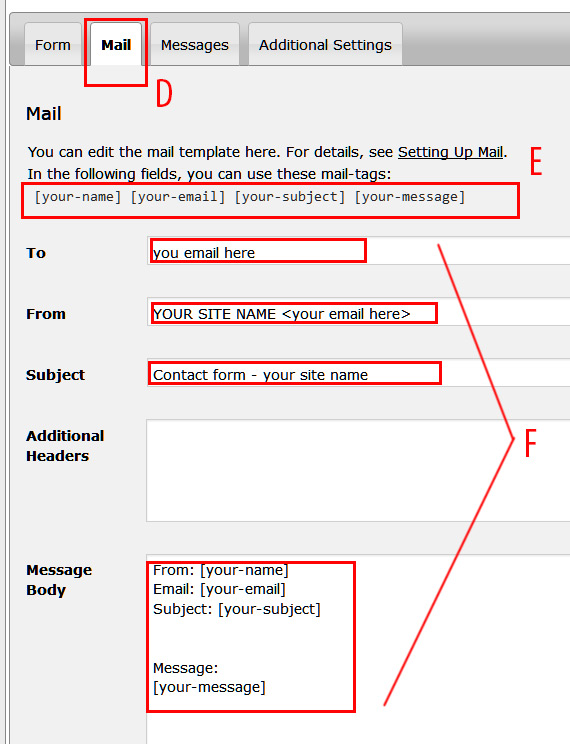
13) On the Mail Tab (D) you will setup the email structure.
Your contact form will not work if you configure wrong this step.
The fields added above at Point 12 will appear here – see image below (E). To: add your email address here. (to avoid errors the address must be under the same domain as your website. (Ex. if your website is test.com then your address must be xxxxxx@test.com – the xxxxxx can be replaced by you name or something else.) The email address must EXIST on your hosting account (test.com). From: Type your site name and add between the brackets you email address. Subject: type what you want to see under Subject when you will receive the email from the form Additional Headers – only if you want some. Message Body: [your-name], [your-email], [your-subject], [your-message] are dinamic and will pass the values entered in the fields generated at point xxxx above. Scroll and Click Save on Bottom of page.
14) Messages and Additional Settings you can leave as are.
15) On the top of page you will have the shortcode to USE in a page or text widget content.
All Done!. Your website has a SECURE contact form protected by Google reCAPTCHA and Akismet .